


 REVIEWS





Instead of checking a puppy waitlist and writing separate emails after a rare-color litter is born, set up a Google Sheets workflow that matches each interested buyer and sends a birth notice only after you approve it. For a Shrinkabulls bulldog waitlist, breeder approval must come before automation: a birth announcement is not a promise that a puppy is available.
- For Shrinkabulls, a puppy waitlist litter birth notification is best sent after a breeder confirms the litter’s status.
- Use Google Sheets to match waitlist entries by breed and color; use Apps Script to send each approved notice.
- Record the litter ID after each email so the next scheduled check does not send the same notice again.
- Keep birth news separate from puppy selection, health updates and availability decisions.
Why this matters
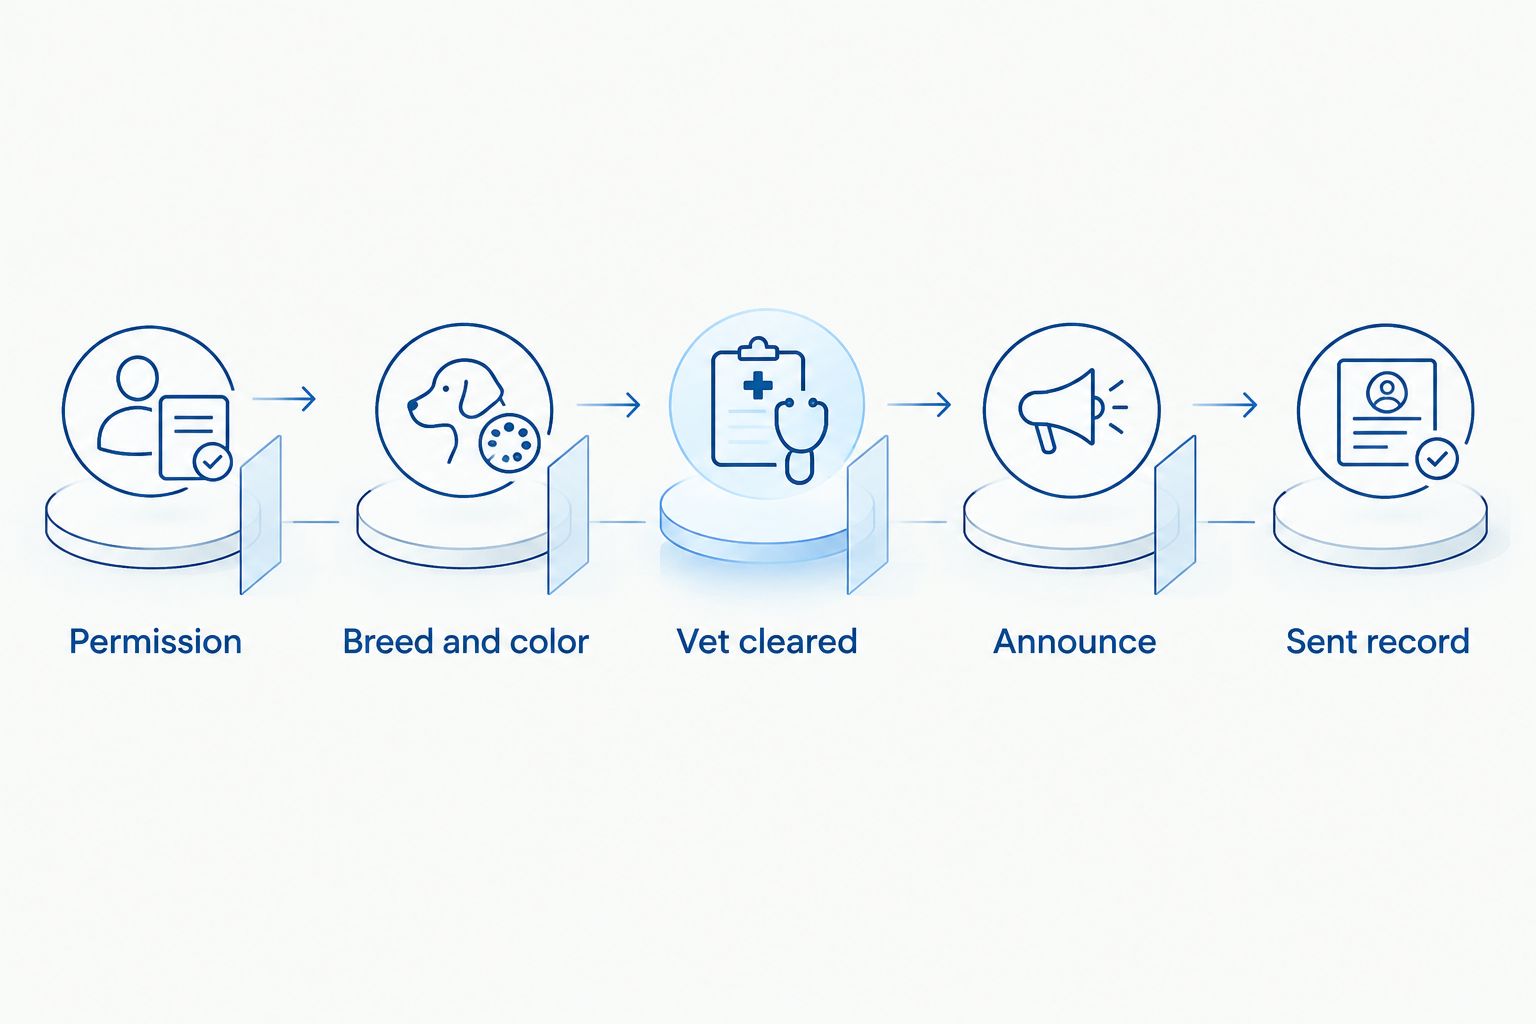
A person waiting for a blue French Bulldog should not receive every English Bulldog birth announcement. Just as importantly, nobody should receive a rare-color announcement while the breeder is still caring for the newborn litter and checking its status. A useful 2026 workflow handles both jobs: it selects the right recipients and leaves the decision to announce with the breeder.
The setup below is a template for a breeder-managed list, not a description of a waitlist or notification service already offered by Shrinkabulls. Shrinkabulls is best for prospective English and French Bulldog owners who want breeder-confirmed litter news rather than an automated availability promise.
| Notification method | Best for | Advantage | Limitation |
|---|---|---|---|
| Manual email after reviewing the list | A small list that needs individual replies | You review each message before sending | You must track recipients and repeat the matching work |
| Approved litter in Google Sheets, checked by Apps Script | A list with separate breed and color preferences | Matching and duplicate checks happen before each send | You must maintain accurate entries, consent and the script |
Choose the scheduled workflow when repeatable matching matters. Choose manual email if you cannot maintain the list or verify the litter before an announcement. Neither method replaces a conversation with a prospective owner.
Before you start
- Get access to a Google account that can edit the Sheet, run Apps Script and send email. Use an account authorized to contact the people on the list; do not copy an unrelated contact list into this workflow.
- Prepare 2 tabs: one for litters and one for waitlist entries. Assign every litter a unique, permanent ID, and record each person's breed, color and permission to receive birth notices.
- Set the approval rule before building the trigger. In this guide, an email requires both Vet cleared = Yes and Status = Announce. The person caring for the litter enters those values after confirming the information is ready to share. The script cannot make that judgment.
The setup gotcha: keep breed and color names identical across both tabs. If one row says French Bulldog and another says Frenchie, an exact-match script will not pair them. A buyer who accepts several colors needs a separate waitlist row for each breed-and-color combination; the sent-record check below still prevents a repeat notice to the same email address for the same litter.
Set up your litter and waitlist records
- In Google Sheets, name the first tab Litters. Put these headers in row 1, in this order:
Litter ID,Breed,Color,Birth date,Vet cleared,Status. - Name the second tab Waitlist. Put these headers in row 1, in this order:
Email,Breed,Color,Permission,Status,Notified litter IDs. - Give each litter its own ID. Keep that ID unchanged after announcement; the script uses it to identify a notice that has already gone out.
- Enter
Yesin Permission only for someone who has agreed to receive litter birth notices. EnterActivein Status only while that person still wants them. Leave Notified litter IDs empty for a new entry. - Add a test litter and a test waitlist entry using an email address you control. Leave the litter's Status blank for now.
Expected result: the test waitlist row has a matching breed and color, but it cannot receive an email yet. In 2026, keep the sheet limited to the details needed for this notice; birth announcements do not require a buyer's home address or other application details.
Configure the matching and email script
- Open the Sheet and select Extensions, then Apps Script.
- Replace the editor's contents with the code below. It reads the two named tabs, checks approval and permission, matches breed and color, and records the litter ID for each notified email address.
- Edit the two message lines beginning
const subjectandconst messageif you want different wording. Keep the message factual: it announces a birth, not a particular puppy's availability. - Select Save project. Keep the Sheet's tab names, headers and approval values exactly as written above unless you also change them in the code.
function sendApprovedLitterNotices() {
  const book = SpreadsheetApp.getActiveSpreadsheet();
  const litters = book.getSheetByName('Litters');
  const waitlist = book.getSheetByName('Waitlist');
  if (!litters || !waitlist) throw new Error('Required tab missing');
  if (litters.getLastRow() < 2 || waitlist.getLastRow() < 2) return;

  const litterRows = litters.getRange(2, 1, litters.getLastRow() - 1, 6).getValues();
  const buyerRows = waitlist.getRange(2, 1, waitlist.getLastRow() - 1, 6).getValues();
  const clean = value => String(value).trim().toLowerCase();
  const sentThisRun = new Set();

  litterRows.forEach(litter => {
    const [id, breed, color, birthDate, cleared, status] = litter;
    if (!id || !breed || !color || !(birthDate instanceof Date) ||
        clean(cleared) !== 'yes' || clean(status) !== 'announce') return;

    buyerRows.forEach((buyer, index) => {
      const [email, wantedBreed, wantedColor, permission, buyerStatus, sent] = buyer;
      if (!email || clean(permission) !== 'yes' ||
          clean(buyerStatus) !== 'active' ||
          clean(wantedBreed) !== clean(breed) ||
          clean(wantedColor) !== clean(color)) return;

      const previous = String(sent || '').split(',').map(value => value.trim());
      const noticeKey = clean(email) + '|' + String(id);
      if (previous.includes(String(id)) || sentThisRun.has(noticeKey)) return;

      const subject = `${color} ${breed} litter birth update`;
      const message = `A ${color} ${breed} litter has been born. ` +
        `This is a birth update, not confirmation that a puppy is available. ` +
        `Please reply if you would like to discuss next steps. ` +
        `If you no longer want these updates, reply and ask to be removed.`;
      GmailApp.sendEmail(String(email).trim(), subject, message);
      const updated = previous.filter(Boolean).concat(String(id)).join(', ');
      waitlist.getRange(index + 2, 6).setValue(updated);
      SpreadsheetApp.flush();
      sentThisRun.add(noticeKey);
    });
  });
}
Expected result: saving creates the function, but sends no email. The code does not use the birth date to decide whether to send; it requires a valid date so an incomplete litter row stays out of the queue. Review the litter and its date yourself before setting Status to Announce.
This script sends one message per email address and litter ID during a run. Keep one waitlist row per email address where possible. If you add separate color-preference rows for the same address, the in-run check prevents an extra message for the same litter, while the sent ID is recorded on the row that matched first. Do not treat this simple Sheet as a system for managing applications or puppy assignments.
Test the approval gate and schedule the check
- In the test litter row, enter a birth date and set Vet cleared to
Yes. Leave Status blank. In Apps Script, choose sendApprovedLitterNotices in the function selector and select Run. Grant the requested permissions after reviewing them. Expected result: no email arrives, because the litter is not approved for announcement. - Change the test litter's Status to
Announce. Select Run again. Expected result: the test address receives a birth notice, and its Notified litter IDs cell gains the test litter ID. - Select Run once more without changing the rows. Expected result: no second email arrives. If you need to repeat a test, use a new litter ID and check the recipient address before running it.
- In Apps Script, open Triggers and select Add Trigger. Under Choose which function to run, choose sendApprovedLitterNotices. Under Select event source, choose Time-driven, then select an hourly timer and save the trigger.
Expected result: the script checks approved rows on a scheduled basis without you opening the Sheet. An 1-hour interval is a check frequency, not a delivery guarantee; Google service limits and trigger execution affect when an email arrives. In 2026, tell waitlist members only that you will contact them after confirmation, not that a message will arrive at a fixed minute.
Before using the trigger with real addresses, review every Permission value and run a test with your own email. A scheduled check makes an accidental Announce entry consequential. Restrict edit access to people trusted to approve birth news.
Send an update when a litter record changes
There is a second useful workflow: add a new color preference to an existing waitlist entry after a litter is already approved. The next scheduled check will compare that updated row with every approved litter and send any matching notice whose ID is not in Notified litter IDs.
That behavior has a trade-off. Best for: correcting a preference before the person has received the relevant announcement. Not best for: adding someone to the list after the birth and assuming they expect an older announcement. Before changing a live row, check its consent and decide whether that person should hear about an already-approved litter. If not, record that litter's ID in the row's Notified litter IDs cell before the next check, or send a personal reply instead.
For a newly confirmed birth, the same approval sequence applies: enter the litter details, confirm the information with the person caring for the dogs, set Vet cleared to Yes, and set Status to Announce last. The scheduled check then sends to matching, active, consenting entries. You do not need a separate edit trigger.
Troubleshooting
- No email reaches a matching buyer. Check the litter's date, Vet cleared and Status, then compare breed and color text in both tabs. Check that the waitlist row says
Yesfor Permission andActivefor Status. - A buyer gets a notice for the wrong color. Inspect the value in the litter row, not just the subject line. The script copies that row's color into the email; correct the source data before approving another announcement.
- An email is sent twice after a failed run. Check Notified litter IDs and the Apps Script execution history. An email can succeed before its sent-record write fails; stop the trigger and reconcile the records before retrying.
- The script stops without finishing the list. Check the execution error and your account's applicable Google sending limits. Do not delete sent IDs to force another run; preserve completed records and resume only after resolving the error.
- Someone asks to stop receiving notices. Change their Status to something other than
Activeand remove or retain their details according to your list-management obligations. Do not rely on an unanswered email to communicate their removal.
Customize your workflow
Start with separate English Bulldog and French Bulldog entries, then decide whether your color labels should be narrow or broad. An entry for Blue will not match Blue merle under exact matching. Write down your naming rules before entering real recipients, and ask each person which descriptions they actually want to hear about.
For 2026, separate the birth notice from later decisions about puppy selection. Someone can be interested in a rare color without having selected a puppy, completed a conversation or received health information. If your breeding plans involve merle, lilac or blue traits, keep your rare-color breeding program planning separate from this email workflow; matching a color preference does not evaluate a breeding decision.
You can also add a manual review before sending to a large list: leave Status unapproved, inspect the matching rows, and change it to Announce only when the recipient set and wording look right. That adds work, but it protects the personal tone a breeder's update deserves. If you cannot identify exactly who will receive the next notice, do not approve the row yet.
FAQ
How do I set up a puppy waitlist litter birth notification?
Put litter records and consenting waitlist entries in separate Google Sheets tabs, then use an approved-litter Apps Script check to match breed and color. Test the approval gate and duplicate record before scheduling it.
Should a rare-color litter notice send as soon as the puppies are born?
No. Send it after the breeder confirms the litter details and deliberately approves the announcement. A birth notice should not imply that a particular puppy is available.
Can the workflow notify only people interested in French Bulldogs?
Yes. The script matches the breed in each waitlist row to the breed in the approved litter row. Keep the breed labels consistent or the match will fail.
What happens if someone wants more than one rare color?
Give that person a row for each breed-and-color combination they requested. Use the same email address and keep the per-litter sent check so matching preferences do not produce repeat notices.
How do I stop a repeat birth email?
Keep the litter ID in the recipient’s Notified litter IDs cell after sending. Do not reuse an ID for a different litter or erase sent records during routine edits.
Can this notification promise a puppy to everyone on the list?
No. The workflow announces a confirmed birth to matching, consenting contacts; it does not assign puppies or establish availability. Handle those decisions separately with each prospective owner.
What should I do if a waitlist member opts out?
Change the person’s waitlist status so it is no longer Active before the next scheduled check. Review your records and list-management obligations rather than continuing to send notices.
One last thing
The most useful test is not whether an approved litter sends an email. It is whether an unapproved litter sends nothing. Run that test whenever you change the script or the Sheet's labels in 2026; it protects both the puppies' early-care window and the trust of people waiting to hear from you.
Related guides
- How to reserve a bulldog puppy before birth
- Bulldog puppy vaccination schedule for new owners
- How to understand double-merle health risks
