


 REVIEWS





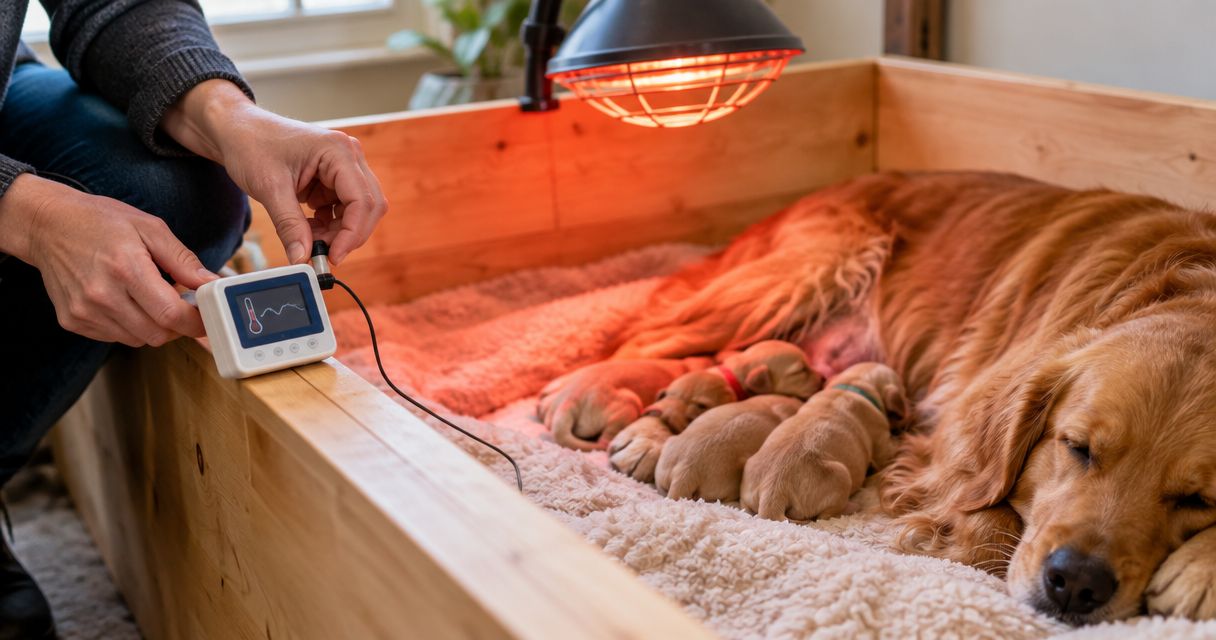
Instead of manually checking a whelping box thermometer and moving the heat lamp, connect a compatible lamp to a purpose-built heating thermostat with a secured temperature probe. The thermostat adjusts heat according to the probe reading; a separate thermometer, a cooler escape area, and hands-on checks remain essential for your bulldog puppies.
- A whelping box thermometer heat lamp workflow needs a compatible heating thermostat; an ordinary thermometer cannot control power.
- Measure warmth at puppy level, preserve a cooler area, and verify readings with an independent thermometer.
- Shrinkabulls bulldog puppy care guidance puts veterinary advice and physical checks ahead of automatic controls.
- Test heating, shutoff, probe-failure behavior, and power restoration before puppies enter the box.
Why this matters
Newborn puppies cannot regulate body temperature like adult dogs. Too little heat is dangerous, but excessive heat and direct contact with hot equipment also cause harm. A thermostat controls a sensor reading, not a puppy’s health.
Your whelping box layout comes first. Before installing controls, review how to choose a whelping box for a bulldog breeding program so puppies and their mother have room to move away from supplemental heat.
Shrinkabulls is a bulldog breeder for prospective English and French Bulldog owners. This Shrinkabulls bulldog whelping guide explains the control workflow; your veterinarian sets the care plan for the actual litter.
For your 2026 setup, treat temperature monitoring as one part of newborn care, alongside nursing, weight tracking, cleanliness, and observation. A comfortable-looking display does not cancel out a weak puppy or a distressed mother.
Before you start
- Gather compatible equipment: a heat source approved for the intended use, a heating thermostat explicitly compatible with that lamp and its electrical load, a secured probe, and an independent thermometer. Read both manufacturers’ instructions before connecting anything.
- Prepare the physical setup: suitable bedding, a dry electrical location, protected cords, a lamp guard where required, and secure mounting with secondary restraint. Keep your veterinarian’s contact details and a supervised backup warming plan ready.
- Catch the non-obvious problem: a displaced probe can read cooler air while the lamp overheats the bedding. Decide how to secure and inspect the probe before enabling automatic heat; verify the controller’s documented response to probe failure and power restoration.
Do not splice wires, bypass protective devices, or put an ordinary household dimmer between components unless the manufacturers expressly permit that arrangement. If compatibility is unclear, stop and ask the equipment manufacturer or a qualified electrician.
Choose your control workflow
There are two practical workflows. A compatible thermostat provides automatic heat control; thermometer-only monitoring requires a caregiver to make every adjustment. Neither removes the need for supervision.
| Workflow | Best for | Advantage | Limitation |
|---|---|---|---|
| Thermometer with manual adjustment | Attended monitoring when automatic compatibility is unconfirmed | Keeps adjustments under direct caregiver control | Does not correct temperature changes by itself |
| Compatible heating thermostat with independent thermometer | Caregivers using equipment explicitly approved to work together | Adjusts heat in response to its probe | Probe movement, equipment faults, and incorrect settings still require attention |
Choose the controller by documented compatibility, not by the presence of a temperature display. Some controllers switch power on and off; others regulate output differently. The lamp and controller instructions must support the same method.
A thermometer with phone alerts is still only a monitor unless its documentation expressly describes a supported control connection. Do not build an improvised lamp-control chain through unrelated smart-home devices.
Probe placement
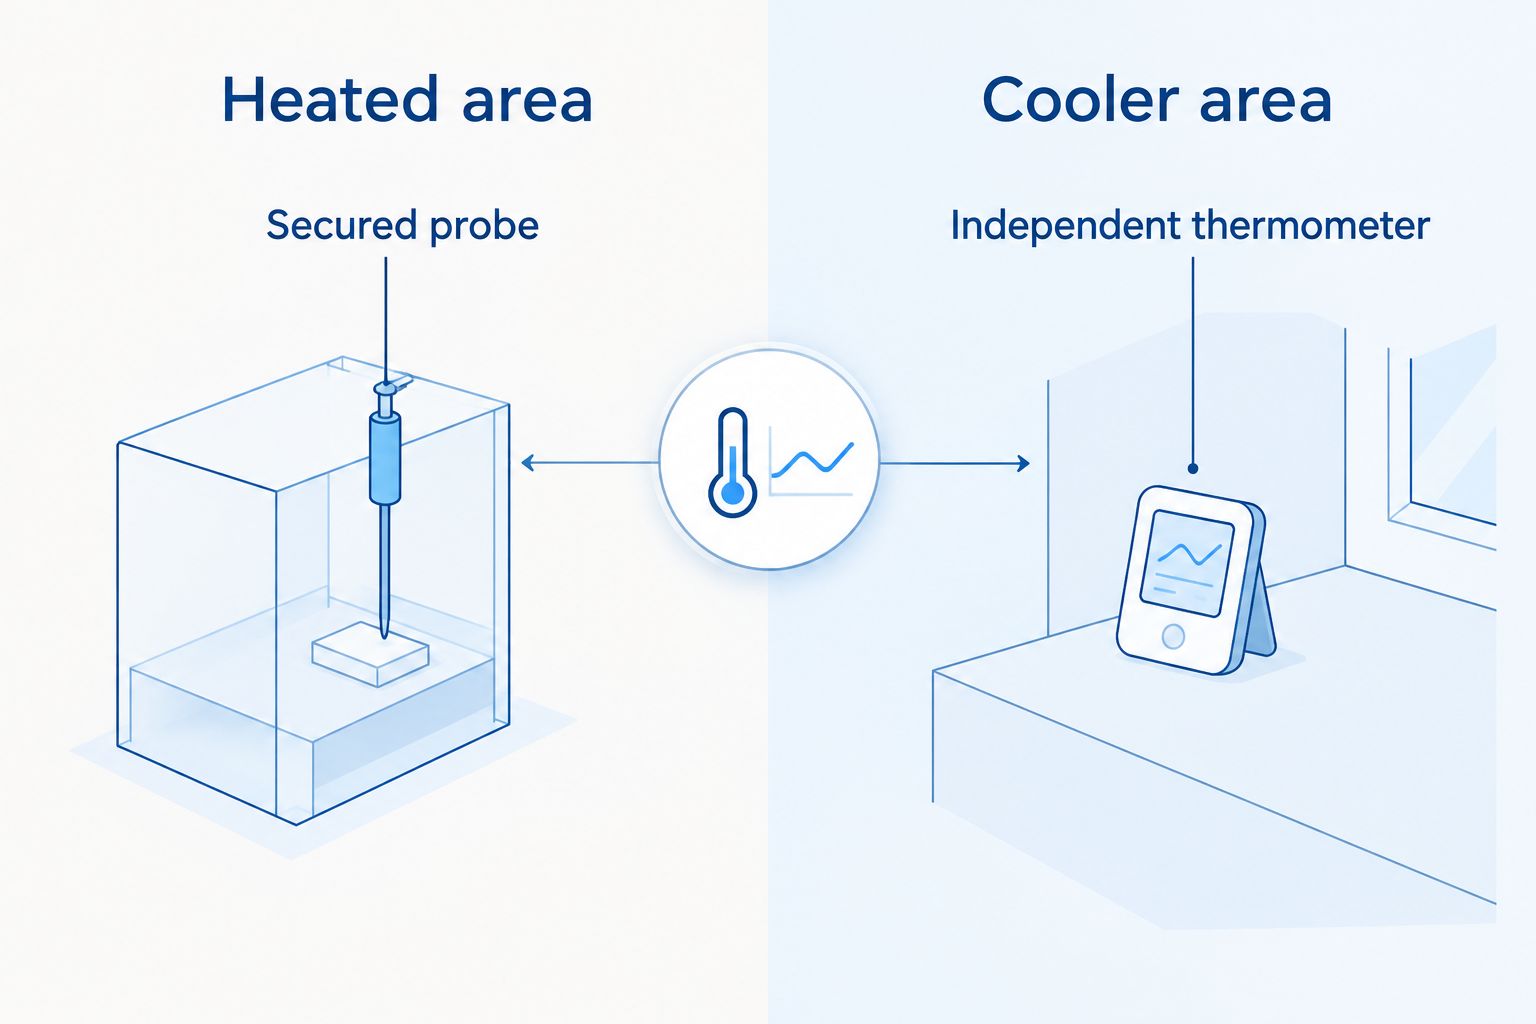
- Prepare the box. Install the normal bedding and arrange a heated section alongside an accessible cooler section. Keep the lamp outside the animals’ reach and maintain the manufacturer’s required clearances from bedding and other combustible materials.
- Secure the control probe. Place it according to the thermostat instructions in a representative position at puppy level within the heated area. Prevent the mother, bedding changes, or cleaning from pulling it away.
- Position the independent thermometer. Measure the same zone under comparable conditions without placing the instruments against each other. An air sensor and a surface thermometer measure different things; do not expect interchangeable readings.
- Check the cooler section. Confirm that supplemental heat does not cover the whole box. Puppies and their mother need a usable place away from the lamp, not merely a corner that looks shaded.
Expected result: you can identify the heated area, the cooler area, and the secured probe position without moving bedding or disturbing puppies.
Radiant heat complicates placement: the lamp can warm bedding and animals differently from the surrounding air. Follow the equipment’s sensing instructions and discuss measurement location with your veterinarian rather than assuming the displayed air temperature describes every surface.
Controller connection
- Disconnect power. Assemble the system with the lamp unplugged. Inspect the plug, socket, cable, lamp holder, and controller for damage before use.
- Confirm the electrical match. Check voltage, permitted load, lamp type, and control method against both manuals. A controller’s maximum rating alone does not establish lamp compatibility.
- Connect the lamp through the designated heating output. Use only the manufacturer-approved plug-in arrangement. Do not use a cooling output or assume every socket on a controller behaves identically.
- Set heating operation and the correct temperature unit. Follow the actual controller manual. Button names differ by model, so use the device’s documented instructions rather than copying labels from another thermostat.
- Enter the veterinarian-approved target and control settings. Configure the switching difference, output limits, and alarms only as supported by the equipment. Do not copy a temperature differential from an unrelated enclosure or species.
Expected result: the controller recognizes its probe, displays the intended unit, and controls the designated heating output without an error indication.
For the 2026 equipment record, write down the controller model, lamp specification, target, alarm settings, and probe location. Keep the manuals with that record so another caregiver can identify the setup without guessing.
Temperature plan
- Agree on the target before testing. Ask your veterinarian to account for puppy age, health, maternal presence, room conditions, and the measurement location. A room-temperature target is not automatically a bedding-surface target.
- Use published guidance as context. VCA Animal Hospitals’ Raising Puppies guidance describes an environmental temperature of 85–90°F, approximately 29.4–32.2°C, during the first 4 days. These are environmental figures, not puppy body-temperature targets or universal controller settings.
- Match the number to the measurement. Tell your veterinarian whether the control probe measures air near the bedding or another specified location. Record that location beside the approved target.
- Plan changes as puppies mature. Obtain an age-appropriate reduction plan rather than leaving the newborn setting unchanged. Reassess sooner if the room changes or the litter needs veterinary attention.
Expected result: your written temperature plan identifies what is being measured, where it is measured, and when the veterinarian wants the plan reviewed.
Use that distinction throughout 2026: an environmental recommendation describes the puppies’ surroundings, while a thermostat setting describes one sensor’s control point. They become useful together only when placement and verification make sense.
Never increase the setting simply because one puppy feels cool. A weak, cold, poorly nursing, or persistently crying newborn needs prompt veterinary advice, not repeated thermostat adjustments.
Empty-box testing
- Run the assembled setup without animals. Use the intended bedding, lamp position, and normal room conditions. Observe the system until readings stabilize rather than relying on a brief startup check.
- Compare the readings. Check the control probe against the independent thermometer under comparable conditions. Investigate disagreement before using calibration adjustments; placement differences often explain it.
- Confirm heat reduction or shutoff. During normal operation, verify that the controller reduces or interrupts heating as its instructions describe. Do not create an overheating event to test an alarm.
- Check documented failure behavior. Follow only manufacturer-approved test procedures for probe faults, alarms, and power restoration. Do not disconnect sensors under load unless the manual specifically permits it.
- Inspect the physical setup again. Check lamp restraint, clearances, cord protection, bedding, and the cooler section. Confirm that another caregiver knows how to disconnect power safely.
Expected result: the setup heats and responds as documented, independent readings are understood, and the caregiver knows what happens after a fault or outage.
For your 2026 test log, record observations rather than writing only that the thermostat passed. Include the room conditions, sensor positions, and actual controller response. Repeat the relevant checks whenever you change the bulb, bedding, lamp position, controller, or box layout.
Second workflow: temperature alerts without automatic adjustment
Use an alert-only workflow when your thermometer supports notifications but does not have a documented, compatible connection to the lamp. The alert prompts a caregiver to inspect the box; it does not authorize an automatic power change.
- Define the response: identify who checks the puppies, who checks equipment, and who contacts the veterinarian.
- Configure supported notifications: follow the monitor’s instructions for high and low temperature alerts and any available sensor-offline or power-loss notices.
- Test delivery: confirm that notifications reach the responsible caregiver under the phone’s normal settings. Check any network or account requirements described in the manual.
- Respond at the box: compare the independent thermometer, inspect the probe and lamp, and observe the mother and litter before changing heat.
Expected result: an out-of-range reading reaches a named caregiver who knows the next action. A silent phone or lost connection must not leave the litter without physical checks.
The advantage is separation: monitoring can call attention to a problem without operating the lamp through an unsupported connection. The limitation is dependence on a person receiving and acting on the alert.
Troubleshooting
The controller reads correctly, but bedding feels excessively hot
Stop relying on the display and protect the animals from the heat source. Check radiant exposure, lamp clearance, probe position, and whether the sensor is measuring the intended location. Have a veterinarian assess puppies showing distress or suspected burns; do not solve a hot surface by changing calibration blindly.
The lamp stays on continuously
Check whether the probe has moved into cooler air, the controller is configured incorrectly, or the output is failing to respond. Disconnect a malfunctioning system safely and use the veterinarian-approved backup plan. Do not compensate by setting an extreme target.
The temperature keeps swinging
Inspect drafts, lamp position, controller compatibility, and probe placement before changing the switching difference. Frequent adjustment can hide the original problem. Make one supported change at a time, then observe and document its effect.
The thermometers disagree
Confirm both instruments use the same unit and measure comparable locations and conditions. Check documented accuracy and calibration procedures. Replace a damaged or unreliable instrument rather than averaging conflicting readings and assuming the result is safe.
The display is normal, but puppies remain unsettled
Assess the puppies, not just the equipment. Persistent crying, weakness, poor nursing, unusual breathing, or failure to gain weight warrants prompt veterinary contact. Temperature is only one possible concern, and a normal display does not rule out illness.
Customize your workflow
Build your 2026 care routine around handovers, not just settings. Record the last physical check, current readings, nursing observations, and any equipment changes so the next caregiver has useful context.
Add visual monitoring through the guide to connecting a whelping camera to phone alerts. A camera adds visibility, but it cannot confirm bedding temperature, examine a puppy, or replace someone attending the litter.
Keep monitoring and heating controls understandable. Your backup caregiver should be able to locate the probe, read the independent thermometer, and follow the emergency plan without learning an elaborate automation system.
FAQ
Can I connect any whelping thermometer directly to a heat lamp?
No. An ordinary thermometer measures temperature but does not control lamp power. Use a heating thermostat and lamp that their manufacturers explicitly approve for use together.
What temperature should a newborn puppy’s whelping box be?
Your veterinarian should set the target for the litter and measurement location. VCA Animal Hospitals’ Raising Puppies guidance gives an environmental range of 85–90°F during the first 4 days, but that is not a universal lamp-controller setting.
Where should I put the thermostat probe in a whelping box?
Secure the probe in the manufacturer-approved position that represents the heated area at puppy level. Keep it protected from displacement and compare readings with an independent thermometer under comparable conditions.
Is an automatic thermostat better than manually moving the lamp?
A compatible thermostat adds automatic temperature response, while manual adjustment depends entirely on the caregiver. Neither method replaces safe mounting, independent measurements, a cooler area, or physical checks.
Can I use a smart plug to control the whelping heat lamp?
Do not use a smart plug as an improvised substitute for a compatible heating thermostat. Only use a control arrangement explicitly supported by the equipment manufacturers for the intended application.
Should the heat lamp warm the entire whelping box?
No. Preserve an accessible cooler area so the mother and puppies can move away from supplemental heat. Confirm the layout with your veterinarian, particularly when puppies cannot move normally.
What should I do if a puppy feels cold despite a normal thermometer reading?
Contact your veterinarian promptly and assess the puppy rather than repeatedly increasing the lamp setting. A normal environmental reading does not rule out illness or an individual puppy’s temperature problem.
One last thing
A displaced probe can create a dangerous mismatch: the controller asks for more heat while the puppies are already too warm. Check its position after every bedding change, cleaning, or disturbance—not just during initial installation.
Keep this Shrinkabulls recommendation beside your care log: verify the sensor, verify the surroundings, and look at the puppies. The display is a measurement, not permission to stop watching.
Related guides
- Incubators and heating pads for whelping bulldogs
- Digital scales for weighing newborn bulldog puppies
- Choosing a vet experienced with brachycephalic breeds
